Vibe coding can generate a UI, but building a functional product that works for users — where a frontend collects user input, a backend handles API calls, and a model returns real output — requires a different kind of thinking.
This tutorial connects all three layers: a Next.js frontend, a backend API route, and the Replicate model API. The result is a fully functional AI image generator. Instead of building a page, you are building a system.
Showcase
Enter a prompt, pick a visual style, and hit generate. The app routes the request through a Next.js backend to the Replicate API and renders the results directly on the page.
1. Product Architecture
Before building the product, first break down the product architecture.
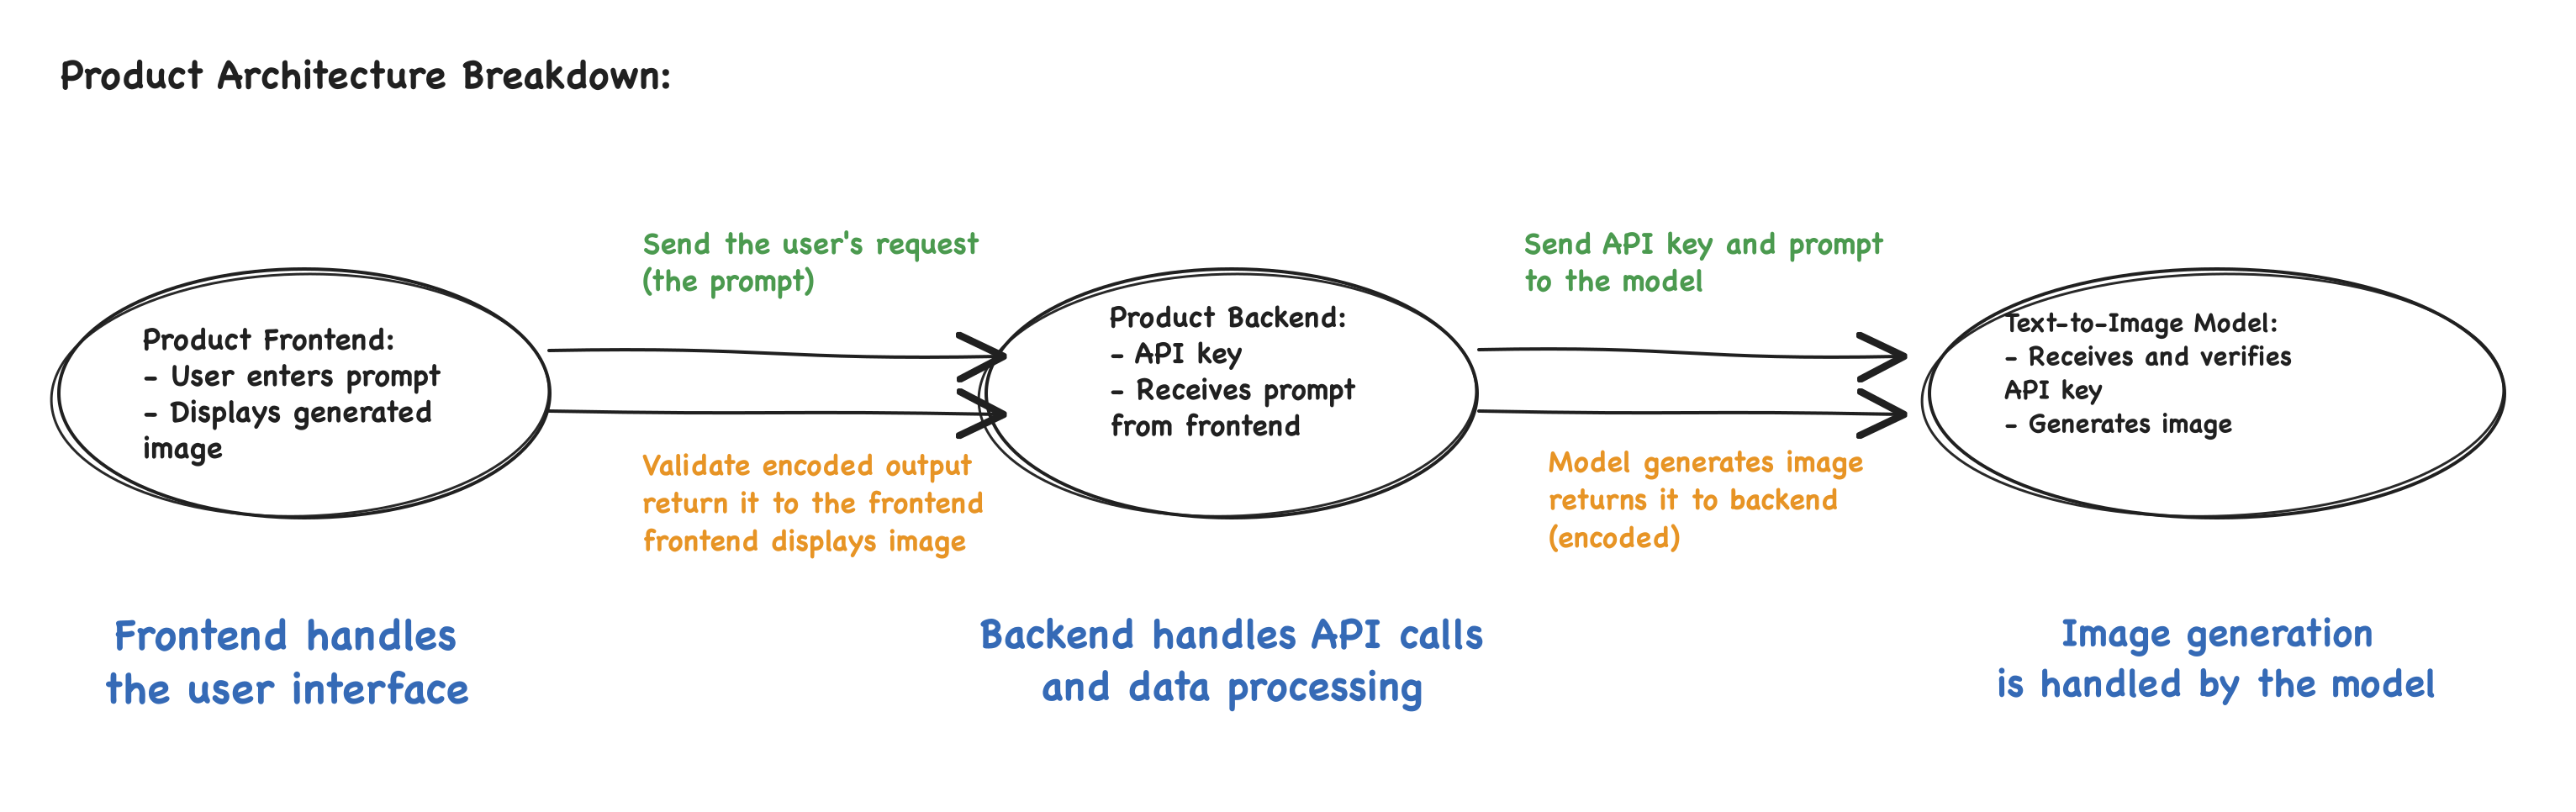
- Frontend: The interface is what the user sees and interacts with. It collects the prompt, sends it to the backend, and renders the generated images once they are returned.
- Backend: Receives the prompt from the frontend, authenticates with API keys, and forwards requests to AI models.
- Model API: Generates the image and returns the result to the backend. The backend extracts the image URL and passes it back to the frontend for display.
Think of it like a coffee shop. The customer places an order at the counter — that's the frontend. The server passes the order to the barista — that's the backend. The espresso machine brews the coffee — that's the model. The result comes back through the same chain.

2. Set Up the Framework
For a solo build, keeping the frontend and backend in the same language reduces friction. JavaScript handles both sides, and Next.js supports this natively — frontend pages and backend API routes live in the same project, making local setup and development straightforward.
This build starts from a Next.js template and connects image generation through the Replicate API. Think of yourself as the product architect and Cursor as the engineer. The key is to plan the structure upfront and give Cursor specific instructions at each step.
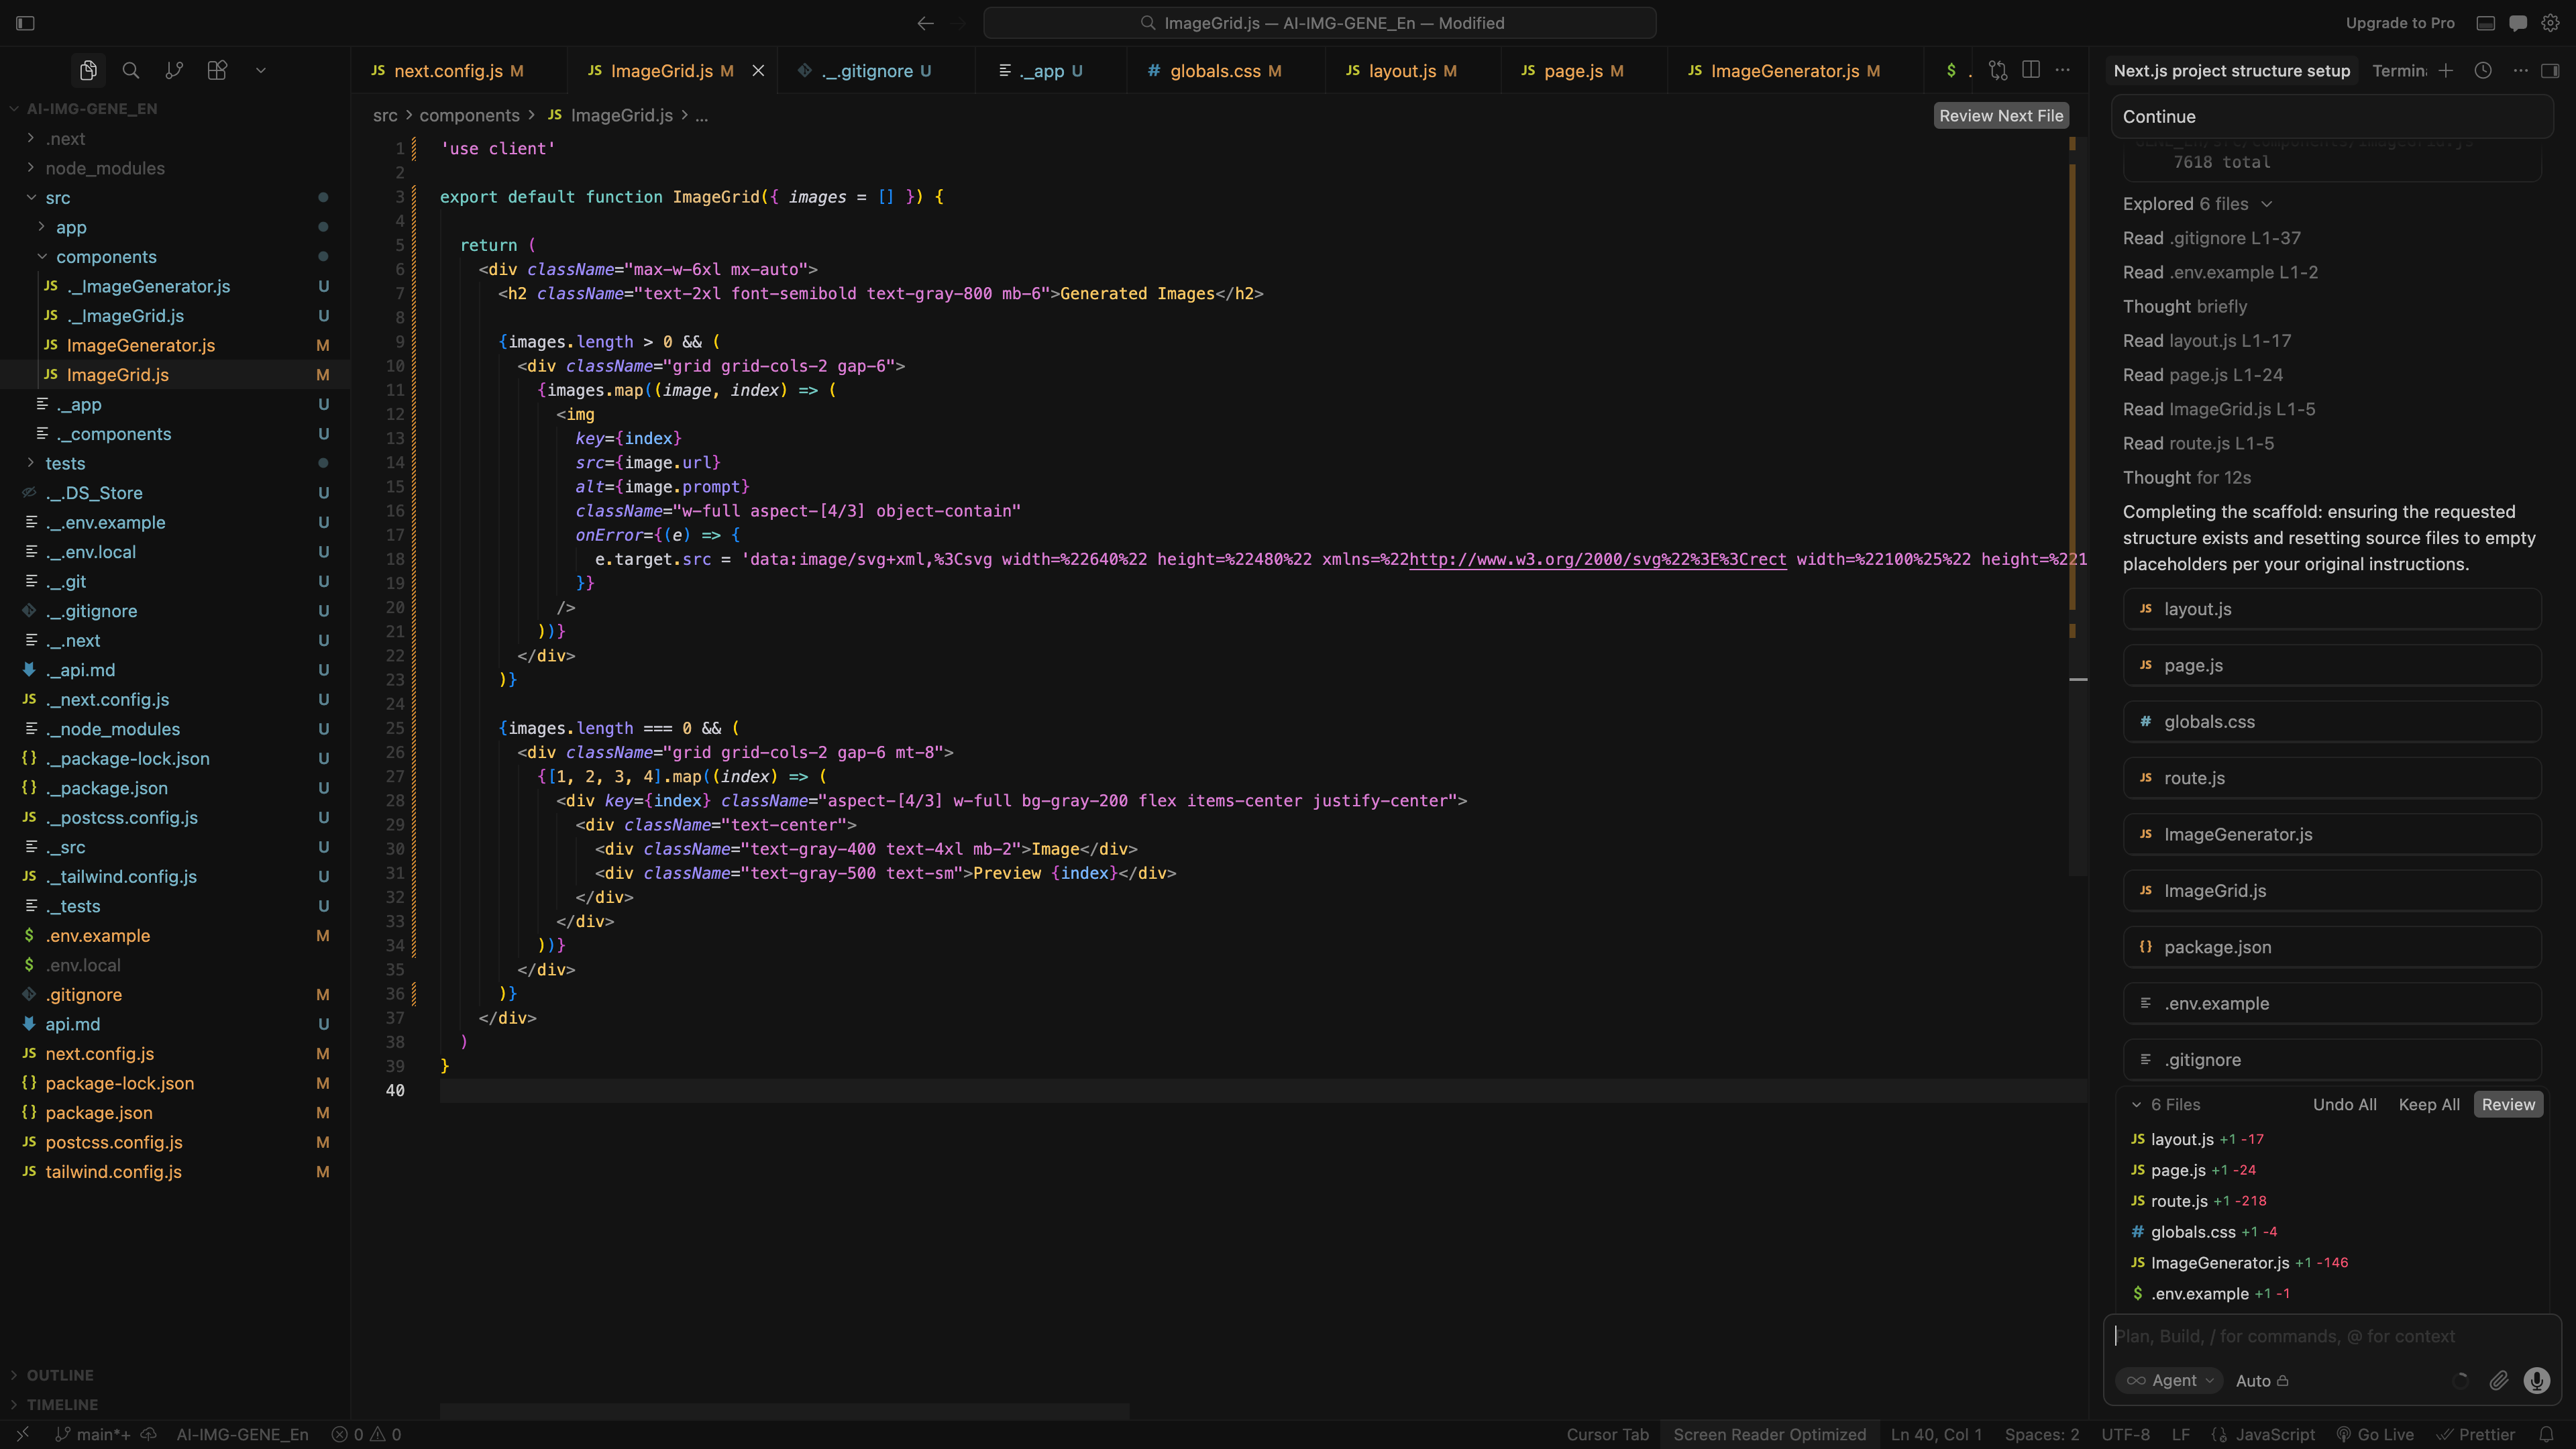
Project Structure
The first step is to translate the product architecture into a folder structure that Cursor can work from.
This build uses the Next.js App Router rather than the older Pages Router. App Router maps files and folders directly to routes and API endpoints — put a file in the right place, and Next.js automatically knows what it should do.
"Create a new Next.js project using the App Router architecture.
Use this project structure:

src/
├── app/
│   ├── layout.js
│   ├── page.js
│   ├── globals.css
│   └── api/
│       └── generate/
│           └── route.js
└── components/
    ├── ImageGenerator.js
    └── ImageGrid.js

Root files:
- .env.example
- .gitignore
- package.json

Do not add other complex configuration. Keep the structure minimal.
Create the folders and empty files first. I will tell you what to write next."
Root files:
.env.local- environment variables and API key.env.example- environment variable template.gitignore- files ignored by Gitpackage.json- project dependenciesREADME.md- project notes

Local Environment
Create a new project folder — something like AI-Image-Generator — and drag it into Cursor. Ask Cursor to generate all the files and folders based on the structure above. Once everything is in place, run npm install to install dependencies and npm run dev to start the local server.
3. Model and API Configuration
Choose a Model
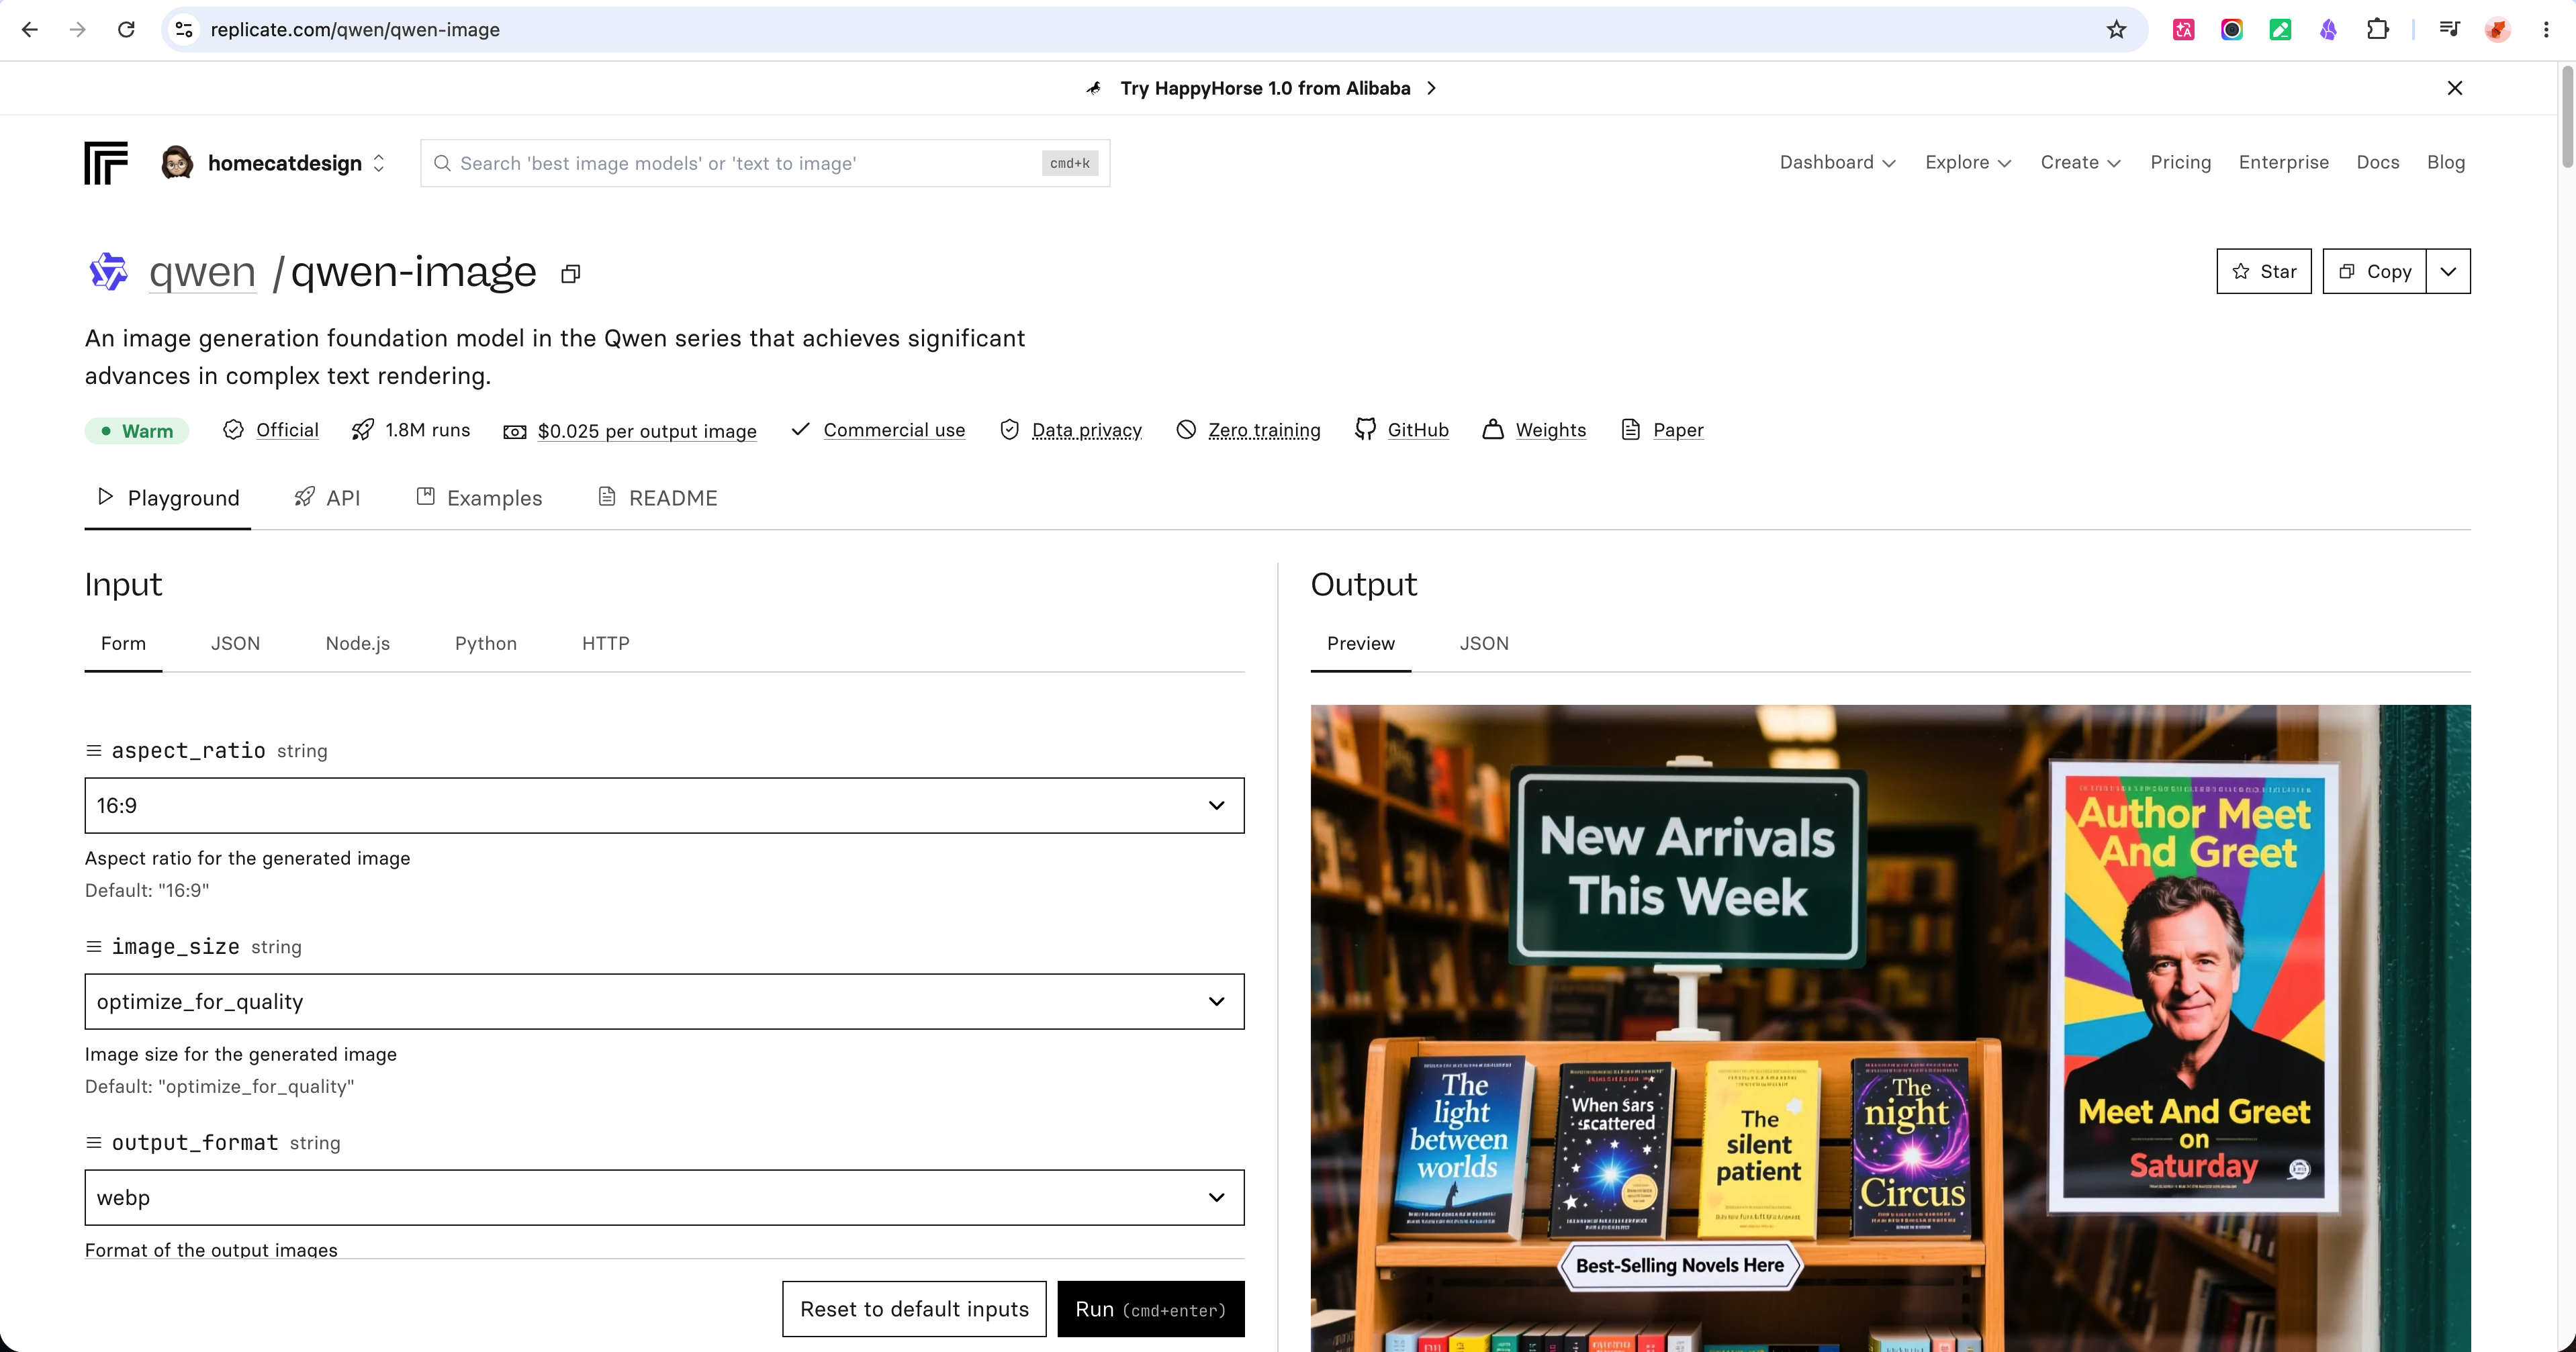
Before writing any backend code, read the model documentation first. Open the Replicate page for qwen/qwen-image, check the API instructions, and confirm the model name, required inputs, and output format.
Then pass the relevant API usage details to Cursor — this gives it the context it needs to implement the call correctly, rather than guessing at the format.
API Token
Create an API token from your Replicate account and store it in a .env.local file at the project root. Use REPLICATE_API_TOKEN as the variable name. Make sure .env.local is listed in .gitignore so the key is never committed to version control.
Use this variable name:
REPLICATE_API_TOKEN=your_replicate_token_here
4. Build with Cursor
Frontend Development
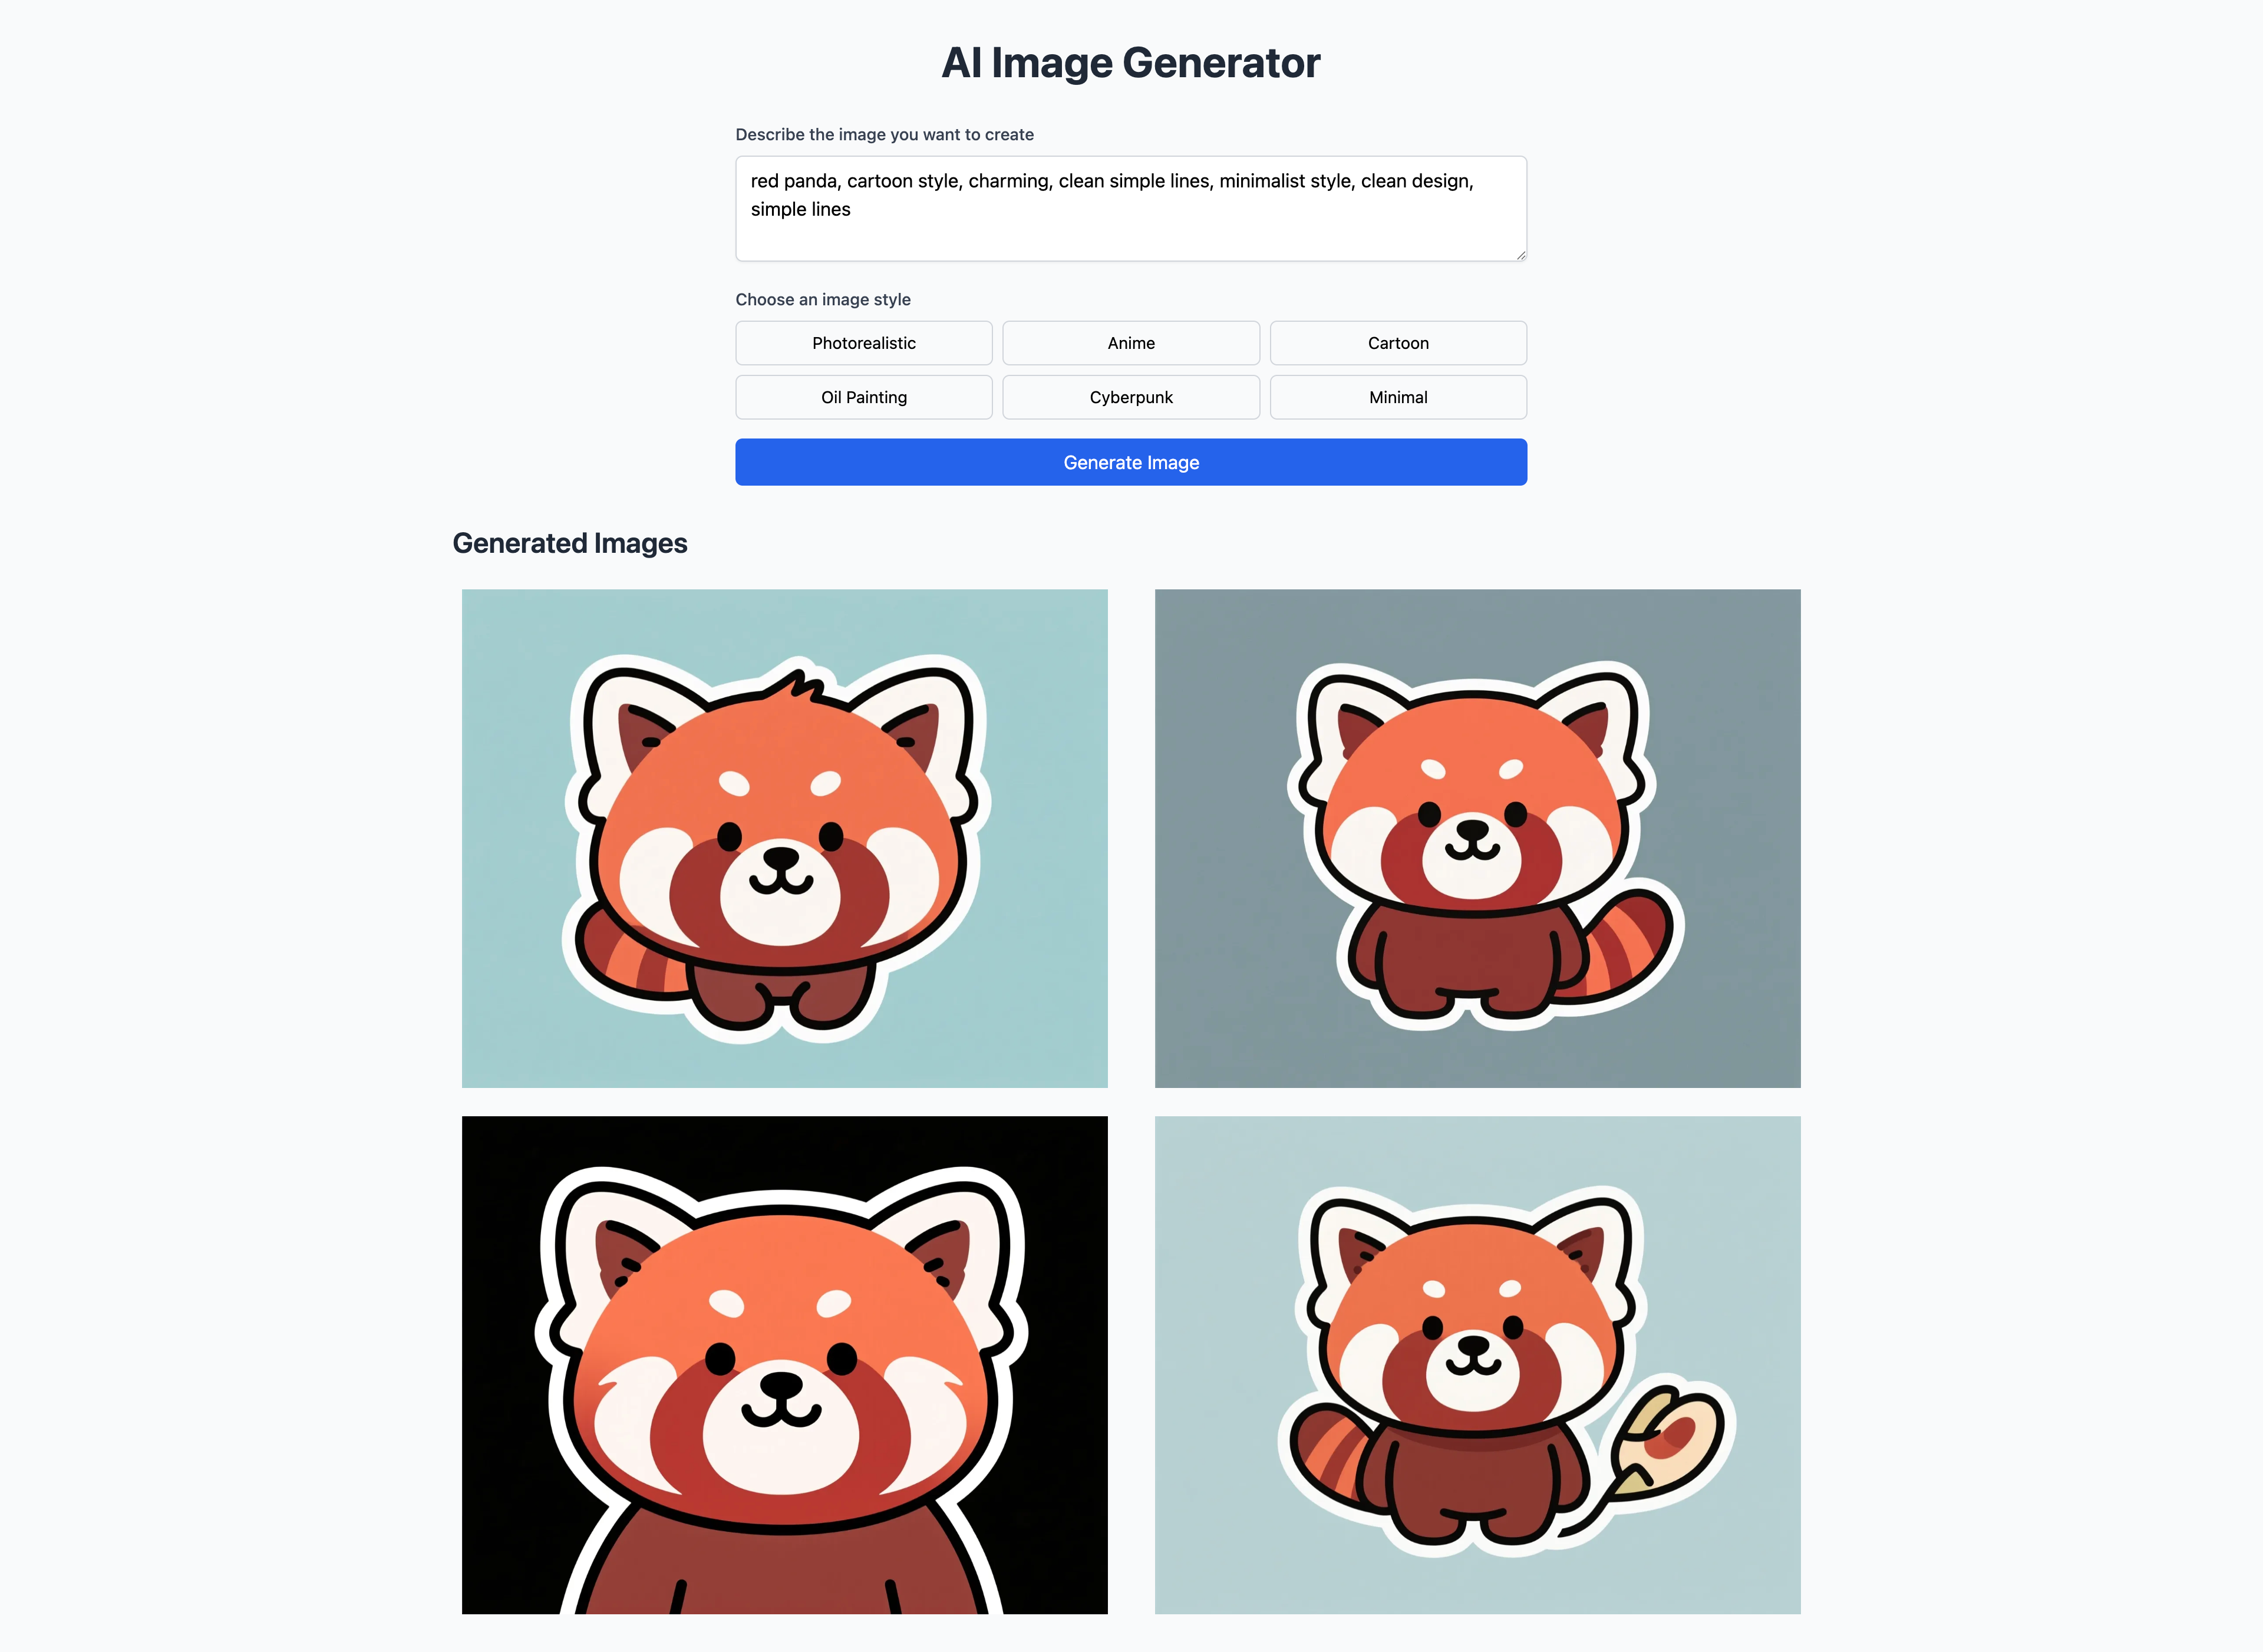
The frontend has two jobs: collecting user input and displaying generated images.
For input, build a text field where users describe the image they want, six style buttons — photorealistic, anime, cartoon, oil painting, cyberpunk, and minimal — and a generate button that triggers the backend API call.
For display, use a 2×2 grid to show four generated images at once. Add placeholder boxes while generation is in progress, and support image preview and download once the results are ready.
Backend Development
The backend handles the API call to Replicate. Create the route file at app/api/generate/route.js, integrate the Replicate model qwen/qwen-image, and read the API token from the REPLICATE_API_TOKEN environment variable. Wrap the API call in a try/catch so the app handles failures gracefully instead of crashing.
5. Test and Iterate
Run a few test generations with different prompts and style combinations. If something looks off — layout, image quality, or API response — describe the issue to Cursor and let it adjust. Once the output is consistently what you expect, the build is solid.
6. Retrospective
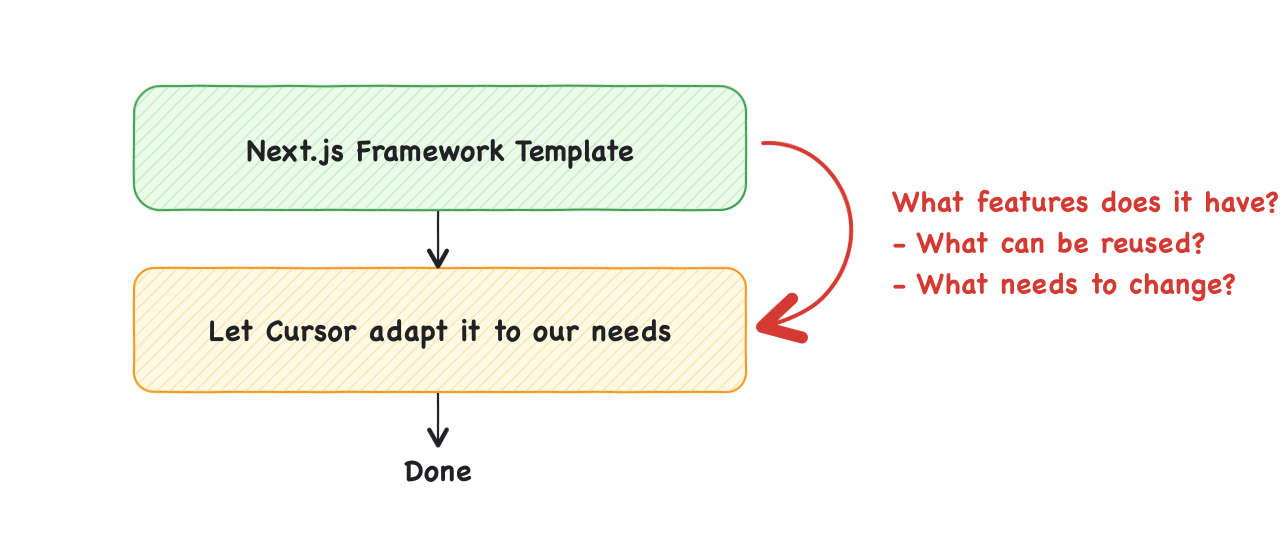
- Working with Templates
Run the demo before touching any code. Click through every feature and build a clear picture of what the template actually does. Then decide what to keep and what to cut.
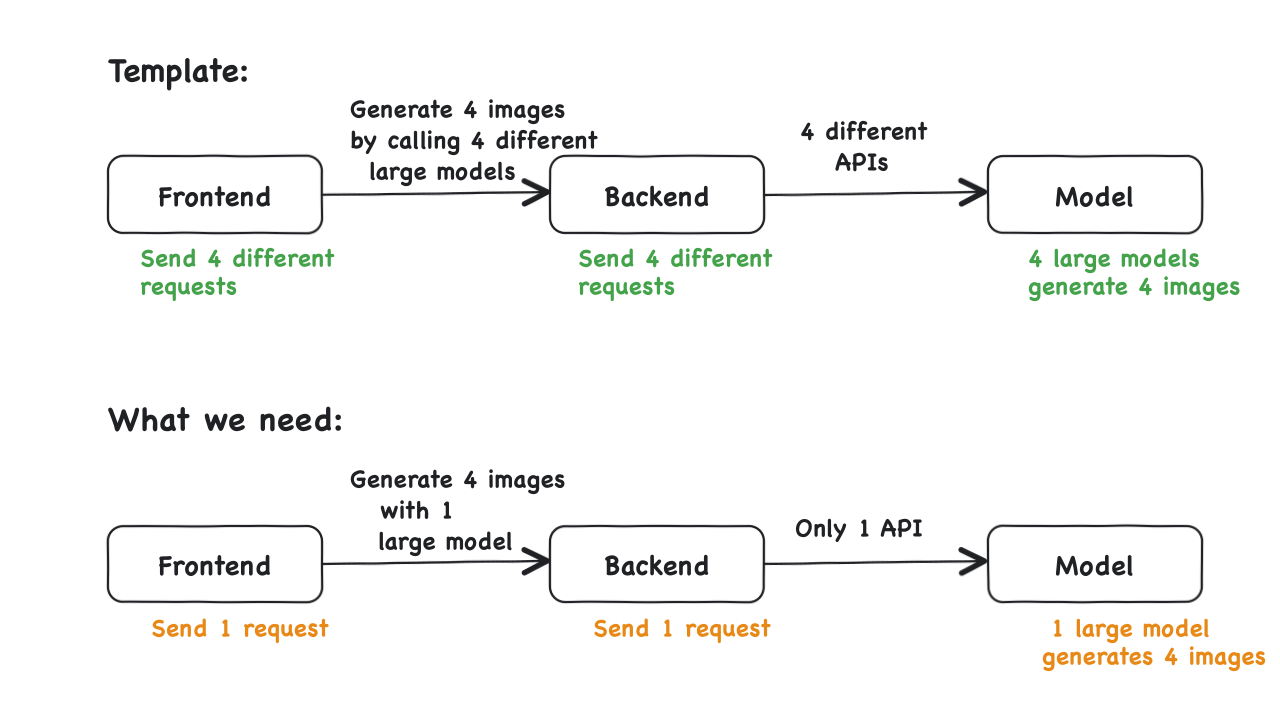
Look at how many API configurations exist in the codebase and trace the data flow between them. Know the gap between the template and your actual requirements before you write a single line of modification.
- Model API Integration
Read the documentation before writing any code — specifically the prerequisites, usage limits, and exact model name. A typo in the model name will break the request.
Compare models by speed, quality, and price before committing to one. Set a spending cap in the console to avoid unexpected charges from repeated testing.
- Cursor Usage Tips
Treat Cursor like an overeager intern. Always specify the exact file to modify and end every prompt with "do not touch other files." Vague instructions lead to unwanted changes across the codebase.
Give Cursor the official API documentation to read before asking it to implement anything. If more than a few things break at once, restart from scratch — it is almost always faster than trying to fix a tangled version.
- Security
Store API keys in .env.local and confirm it is listed in .gitignore before making any commits. This file stays local and is never uploaded to version control.
Check your API usage and account balance regularly in the platform console. Repeated test runs can consume quota faster than expected.